Everything needs a solid foundation if it is going to last, my '54 is no different.
The frame was originally built in 1954 and the 58 years of being exposed to the elements was not the best thing for it. The first thing that needed to be done was stripping it down to a bare frame. The truck bed was the first thing to come off but after sitting out in the elements for as long as it had, every nut and bolt had fused themselves into one piece. After a few attempts to loosen a few of the screws, it became clear that more drastic measures were needed: enter the DeWalt Sawsall and pry bar.

After a couple of hours of work, it was time to lift it off.

The frame on Old Blue is a nice and simple piece of engineering; only four cross members and a couple of mounting points.

The fenders came right off and there were no nasty surprises hiding behind them (or Gremlins but a couple of zombies!).


And now it was time for the big show: The Lifting of the Cab! I had found some pictures on www.stovebolt.com of an attachment for the top of a cherry picker that would let you use it to lift the cab off. So off to the metal shop I went to get the parts.

And after a couple of hours of welding, I had this fine looking tool.

Now it was finally time to lift the cab off of the frame. I set the cherry picker up, centered it in the cab, and put my attachment on top of it.


To my surprise (and the shock of my wife) it actually worked perfectly!!


After pressure washing the frame to within an inch of its life, it was time to remove the axles and put the frame on jack stands to start prepping it for its new coat of paint.

It is amazing how much dirt, grease and other crap had accumulated on this frame over its life. After two weeks of scraping and cleaning, it was time to use the Eastwood chassis restoration kit I had purchased. I grabbed the can of rust converter and read the instructions. "Seemed simple" enough:
1. Make sure metal is free of dirt and grease. Done
2. Take a wire brush and knock off any loose rust. Done
3. Spray rust converter onto rusted frame and watch it turn black. NOPE!!!
I ended up with some black spots, some sticky spots, and some spots just turned to a white powder.
Out came the grinder and flap disk. I took the entire frame down to clean metal

and tried the rust converter again, this time it worked!

After letting the converter fully dry, it was time to encapsulate the frame to keep it from rusting again. E-N-C-A-P-S-U-L-A-T-E...meaning that it covers EVERYTHING in the garage with black crap....again mention of wifey here! :)


The new battery box was bolted onto the frame after the encapsulation but before the finish coat was sprayed on.

The frame came out perfect after two coats of Eastwood chassis black gloss.


Since the truck will still be 6 volt when I am finished, I put a nut, bolt, and over sized washer on the frame before I started putting the chemical and paint on it in the spots where the ground straps go so that I have clean metal for the grounds.

With some help from the old man, thanks Dad, the frame was moved outside so the axles and springs could get cleaned up before remounting them.


All of the bushings, bolts and shackles were replaced on the suspension, good thing because they were SHOT!


With a little help from Dad the frame was moved back inside after the axles and springs were done so the brake system could be replaced. I spoke with the last titled owner of Old blue and according to him in 1980 the master cylinder went out and he couldn't find a new one so that was the last time this truck moved under its own power. Now that these trucks are collectors items a new master cylinder was easy to find.

Since the original brake lines and junction blocks looked questionable I decided to order all new. Its amazing how much easier stuff like this is to work on when the rest of the truck isn't in the way!

I called the old man for some help, again, and in just a couple of minutes we the the rear of the frame sitting on its suspension instead of the jack stands.


I recruited my sons help for mounting the front axle, and had a rolling chassis again!

And that is how the frame sits now, waiting for the body work to be finished.
10/29/12
I had ordered new king pins for the front axle, GM used a style of king pin that didn't require a press to remove or install the bushings in the spindle so this looked to be a simple hour project to do. Boy was I wrong, after I spent four hours trying to beat the old king pins out I decided that the best way to do this job was to pull the axle back off the frame and take it to a machine shop to get the old pins out. It took the machine shop two hours and the use of a 100 ton press to get the old pins out. After getting the front axle back it was refinished and installed onto the springs. The spindles recieved a good degreasing and a fresh coat of primer and paint, then the new king pin bushings slid right in place. With new bushings installed in the spindles the thrust bearings were set on the lower part of the spindles and the new king pins were driven through the two spindle tabs, the axle and the thrust bearing.
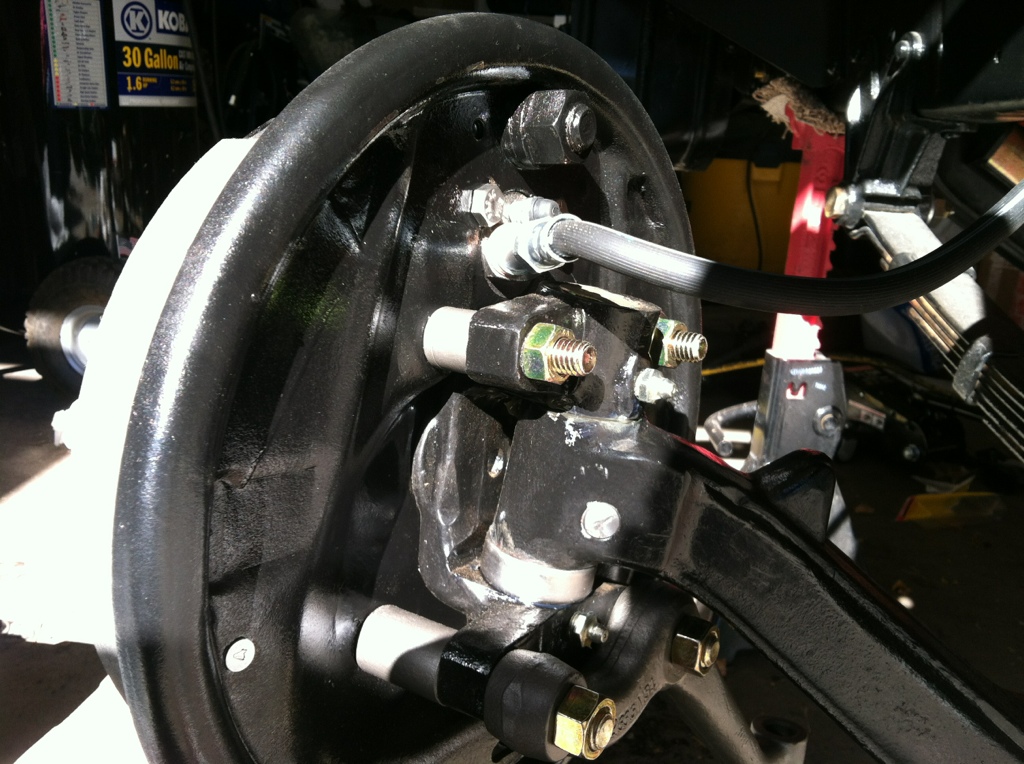
With the spindles mounted I mounted the refinished brake backing plates and the steering arms, then went to install the tie rod after putting a rebuild kit in the ends of the tie rod. It turns out that the new rebuild kit for the tie rod ends don't fit the GMC ball stud so the steering arms came back off so the work could be done to them to accept modern tie rod ends. The original ball studs were instereted into a taper hole in the steering arms, then the ends were heated and hit with a BFH to create a mushroom head on the end.
The first part of the process was to drill a hole in the middle of the mushroom head on the bottom of the ball stud then grind off the mushroom head.


Now the steering arms have been set up for modern tie rod ends and are mounted back on the spindles. The front drum brakes have been rebuilt with all new components springs, adjusters, hold downs, pads and wheel cylinders. As soon as the wheel studs that are on back order arrive the new brake drums will be pressed on the hub and new moders tapperd roller bearings will be pressed into the hubs.

This is a great blog!!! The pictures are great as well. Good job!
ReplyDelete