

One of the items that I inherited with Old Blue was the original engine and boxes of parts for the engine. The engine was rebuilt by the prior owner and is ready to be installed. Time to get more beer!

I quickly made the decision that I needed to get organized and determine what I still needed for the installation. So I decided that the best way to tell what I had and what I was missing was to bolt everything I had to the motor. Isn't she purdy?

It didn't take long to figure out that I was missing a couple of key pieces: the linkage from the carburetor to the gas pedal. Also, that horn looked like crap. Just like with my women, if I have to listen to the noise coming from it...it better damn well be good looking! The horn was an easy fix with paint.

However, the missing throttle linkage was not going to have an easy solution as this was a motor that was used for only one year in this body style truck. Additionally, anything from the Chevy trucks won't work under the hood as GMC and Chevrolet were two separate companies in the 1950's. After a couple of months of watching Craigslist, I found a guy that had one of these motors with a cracked block for sale. I went out to his place and gave him $100 for the motor. I stripped that motor of the throttle linkage, generator bracket, and sheet metal and then took it to the scrap yard and got $80 out of it. So if I do the math right....I paid $20 for all of those original parts! Good deal.

I thought about leaving the engine the Chevy orange that someone had painted it but realized that if anybody who knew GMCs pointed out that the engine was the wrong color, I would be kicking myself for not painting it while it was out of the truck. After looking at a couple of places, I found close to the right color of red at Summit Racing. After stripping the engine down to the bare block and cleaning it all up with Simple Green to make sure there was no oil on it, I gave it a couple of coats of new paint.


After it was painted, the motor was set aside until it was time to get it ready to mount in the frame. To prep the engine for lifting, I had to pull the rocker arm assembly off of the top, pull the push rods, pull two head bolts, and mount a load leveler on the motor.

In the process of taking the push rods out, three of them didn't feel like the others when I was pulling them so I decided to pull the side cover off of the engine to inspect. Good thing that I did. It turns out assembly lube can be sticky and three of the push rods had stuck to the lifters lifting them out of their home.

After fixing the lifters, I mounted the load leveler.

Now all I need is the time to lift and mount the engine.
After I got home from work last night (8/22/12) I started working on getting set up to lift the engine the next day, I had arranged for my dad to come over and help with mounting it in the morning. After I got the cherry picker out, I set the engine stand in front of it and just started working. The next thing I know it's 8pm and the engine is set (sorry Dad).


After I set the engine, I spent three hours fighting the clutch and at 11pm I was finally finished for the night. That day, my alarm had gone off at 2:30am so I was exhausted by this time.
Dad showed up the next morning to help mount the engine but since it was already in, we started trying to mount the transmission. They put pilot bushings in the end of the crankshaft on manual transmission vehicles to keep the input shaft of the transmission from moving around. My GMC used a pilot bearing instead of the bushing and I had messed up installing it. We didn't find this out until the transmission would not seat against the bellhousing of the motor.
After a small fight with the transmission and a little cussing on my part, we got the" now stuck" transmission off of the motor and back on the ground. As soon as we looked into the clutch, it was clear that the pilot bearing was off centered from the clutch hub.
I sat around for a while thinking about the problem; the last thing I wanted to do was take that clutch back apart to center it. While thinking about it I had the bright idea of having my wife push down on the clutch pedal while I used the alignment tool to center the clutch disk to the pilot bearing. It worked!! Until I pulled the alignment tool back out and the pilot bearing came out with it, S. o. B.!!!
I realized at this point that the root cause of this failure was my attempt to install the pilot bearing without the proper tool. The proper tool for this job is a GM tool that hasn't been made since the '60s so it was time to improvise. After measuring the inside and outside diameters of the bearing, I went to Lowes and started digging through the nut and bolt section to make my own pilot bearing installation tool: a 1/2" x 6" bolt, a nut for said bolt, a standard washer, a fender washer and a BFH (GM eat your heart out). To my surprise once again one of my home built tools actually worked!


Since my clutch alignment tool broke in the process of remoing the clutch to re-install the pilot bearing the assembly of the back half of the engine is on hold until I get a new tool.
Since I am at a stand still on the clutch and transmission assembly I went ahead and started bolting the top half of the motor back together and reinstalled the carburator, fan and horn (yes that is the original spot the horn was mounted).

Rocker assembly

Rocker arms and push rods


Throttle linkage stripped from junk engine


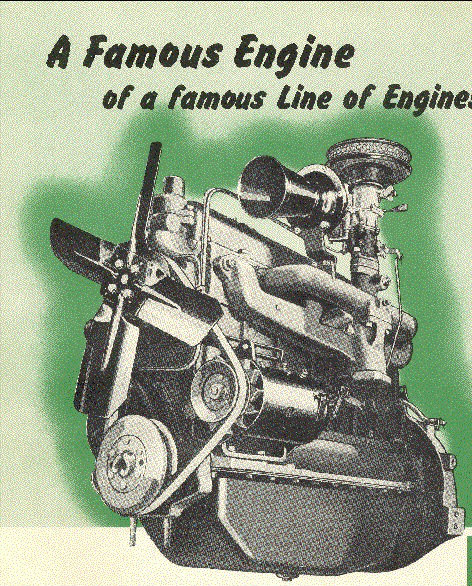
Love the old logo!!
10/29/2012
After getting the stiff engine problem fixed and the clutch installed for the fourth time I finally mounted the transmission. This isn't Old blues original transmission, originaly he had a three on the tree but the previous owner had purchesed a rebuilt 4 speed SM420 that was an original factory option on these trucks so I am not going too far away from a stock rebuild.
Since the back of the engine is complete I started working on the front. Since Old blue is a GMC instead of a Chevy that meant that all of the fuel, oil and vacuum lines had to be hand bent because no one makes replacements for the GMCs. I spent an hour at the local fitting and tubing store trying to find the right parts, the fuel and vaccum lines were easy the fittings for the oil line to the oil filter had to be special ordered (once again the joy of working on a GMC).


With the lines in place it was time to mount the core support and radiator. The core support was powder coated in the highest gloss black that the powder coater had. The radiator is not the original one for this truck but it is an original 1954 GMC radiator that I found in Boise Idaho (another one of those parts that Chev and GMC aren't the same), after bringing it home from a family vacation (wife just loves it when part of our vacations are spent dealing with truck parts) I had it boiled out and pressure tested, it failed the first time so it had to be taken apart and re-soldered. So now I have a core support that looks brand new and an old radiator that cost more than a new one.

As parts come back from the shops I have been storing them in one of the bedrooms, that bedroom was already full when the body shop called and said they were ready for me to come get my fenders and hood and please hurry because we are running out of room. To make space to store the fenders I bolted the inner fenders and other bracketry that had been powder coated with the core support to the core support. I also went ahead and mounted the steering box and column back on the frame since we are going to have roll the frame outside to mount the cab I figured it would be easier to get it where we need it with steering.

Inner fenders and hood latch panels

Right inner fender and outer fender support bracket.
1-5-3-6-2-4 that is the firing order that GM used on there straight 6 engines, and after trying to get the best fitting plug wire to each plug I don't think I will ever forget that sequence.

damn, that is a sexy lookin engine. good call on repainting it red...you made the right decision!
ReplyDeleteShe's purdy.
ReplyDeleteDude...you're a Griffin genius! That tool fabrication was brilliant. You're the real deal tony...keep up the good work!
ReplyDelete